Best Exercises for Knee Pain: A Physiotherapist's Progression
 Dr. Ronak PatelPerformance Physiotherapist
The best exercises for knee pain follow a three-stage progression rather than a random list.
Stage one calms the knee with isometrics, quad sets, straight leg raises, glute bridges and heel slides.
Stage two builds strength with sit to stands, step ups, split squats, terminal knee extension, hip abduction and calf raises.
Stage three restores load tolerance with goblet squats, walking lunges, step downs, hip hinges and early plyometrics.
You move up a stage when the current one is comfortable and the knee is quiet the next day.
Search for knee exercises and you get twenty videos showing twenty movements with no order, no dose, and no idea whether the exercise suits the knee you actually have today. That is why so many people do knee exercises for six weeks and feel no different.
Exercise works for knee pain, and the evidence for that is about as settled as anything in musculoskeletal care gets. But it works when it is staged, dosed and progressed.
This is the progression a physiotherapist would actually build, with the numbers included and the criteria that tell you when to climb.
Why exercise, and why not rest
The old advice for a sore knee was rest, ice and avoidance. We now know that works for the first few days after an acute injury and works badly after that.
Muscle strength around the knee falls measurably within a week or two of unloading, and the quadriceps is the shock absorber that keeps force off the joint surfaces. Rest a knee for a month and you return with the same problem plus a weaker leg, which is why so many people cycle through flare-ups for years.
Research consistently supports exercise as the core treatment for knee osteoarthritis, patellofemoral pain and tendon problems alike. What changes between those conditions is the dose and the sequence, not the principle.
The pain rules that govern everything below
Before any exercise, learn the two rules that keep this safe. First, the during-exercise rule: pain up to about 3 out of 10 is acceptable, as long as it does not make you change how you move and it settles within roughly an hour of finishing.
Second, the 24 hour rule: the honest verdict comes the next morning. If the knee is no stiffer and no more painful than usual, the dose was right.
If it is clearly worse, or if it stays worse for more than 24 hours, the dose was too high. Reduce range, reduce load, or reduce sets by about a quarter and try again in the next session.
Do not stop.
Stage 1: calm it down
The goal of stage one is not strength. It is to reduce irritability while keeping the quadriceps switched on, so you enter stage two with a leg that has not wasted.
Everything here is low load, high frequency, and can be done at home on the floor with no equipment. Aim for once daily, or twice daily if you have the time, for one to two weeks in most cases.
If your knee has been painful for months, expect stage one to take longer.
- Quad set (isometric). Lie or sit with the leg straight. Press the back of the knee down into the floor, tightening the thigh. Hold 10 seconds, relax 5. Do 10 repetitions, 2 to 3 times a day.
- Wall sit isometric. Back against a wall, knees bent to a pain-free angle, often 30 to 60 degrees to start. Hold 30 to 45 seconds. 4 to 5 holds, 1 minute rest between. Once daily.
- Straight leg raise. Lie flat, opposite knee bent. Tighten the thigh of the straight leg and lift the heel about 30 cm, lower with control over 3 seconds. 3 sets of 10, once daily.
- Glute bridge. Lie on your back, knees bent, feet flat. Drive through the heels and lift the hips, squeeze for 2 seconds at the top, lower over 3 seconds. 3 sets of 12, once daily.
- Heel slides. Lying on your back, slide the heel toward you to bend the knee as far as is comfortable, hold 3 seconds, slide back. 2 sets of 15. Use this if range is restricted rather than if pain is the main problem.
The isometric work deserves a note. Holding a static contraction for 30 to 45 seconds at a moderate to high effort tends to reduce knee pain in the short term and lets you load the quadriceps when moving hurts.
If a wall sit at 60 degrees is provocative, go shallower. If it is easy, go deeper or add a small weight on your lap.
The wall sit is the single most useful exercise in this article for an angry knee.
Moving up from Stage 1
You are ready for stage two when you can hold a 45 second wall sit at a comfortable depth without pain above 3 out of 10, complete the straight leg raises and bridges without the knee complaining, walk on flat ground for at least fifteen minutes without a flare, and wake up with the knee no worse than the day before for three consecutive days. Two of those four is not enough.
If you have swelling that returns after activity, stay in stage one and reduce the daily total until it stops.
Book an assessment at SattvaRig, Science City or Shilaj, and get your stage, your dose and your progression criteria set by a physiotherapist who has tested your leg.
Stage 2: build strength
Stage two is where recovery actually happens. The aim is real strength through range, and that means fewer sessions, heavier effort and proper rest.
Train these three times a week on non-consecutive days, not daily. Take 60 to 90 seconds of rest between sets.
Use a lowering tempo of three seconds on every repetition, because the eccentric phase is where the muscle absorbs force and where a lot of the adaptation comes from. Expect to spend three to six weeks here, and longer if you started weak.
- Sit to stand. From a chair, stand up and sit back down over 3 seconds, without using your hands. 3 sets of 10. Progress by lowering the chair height, then by holding a weight to your chest.
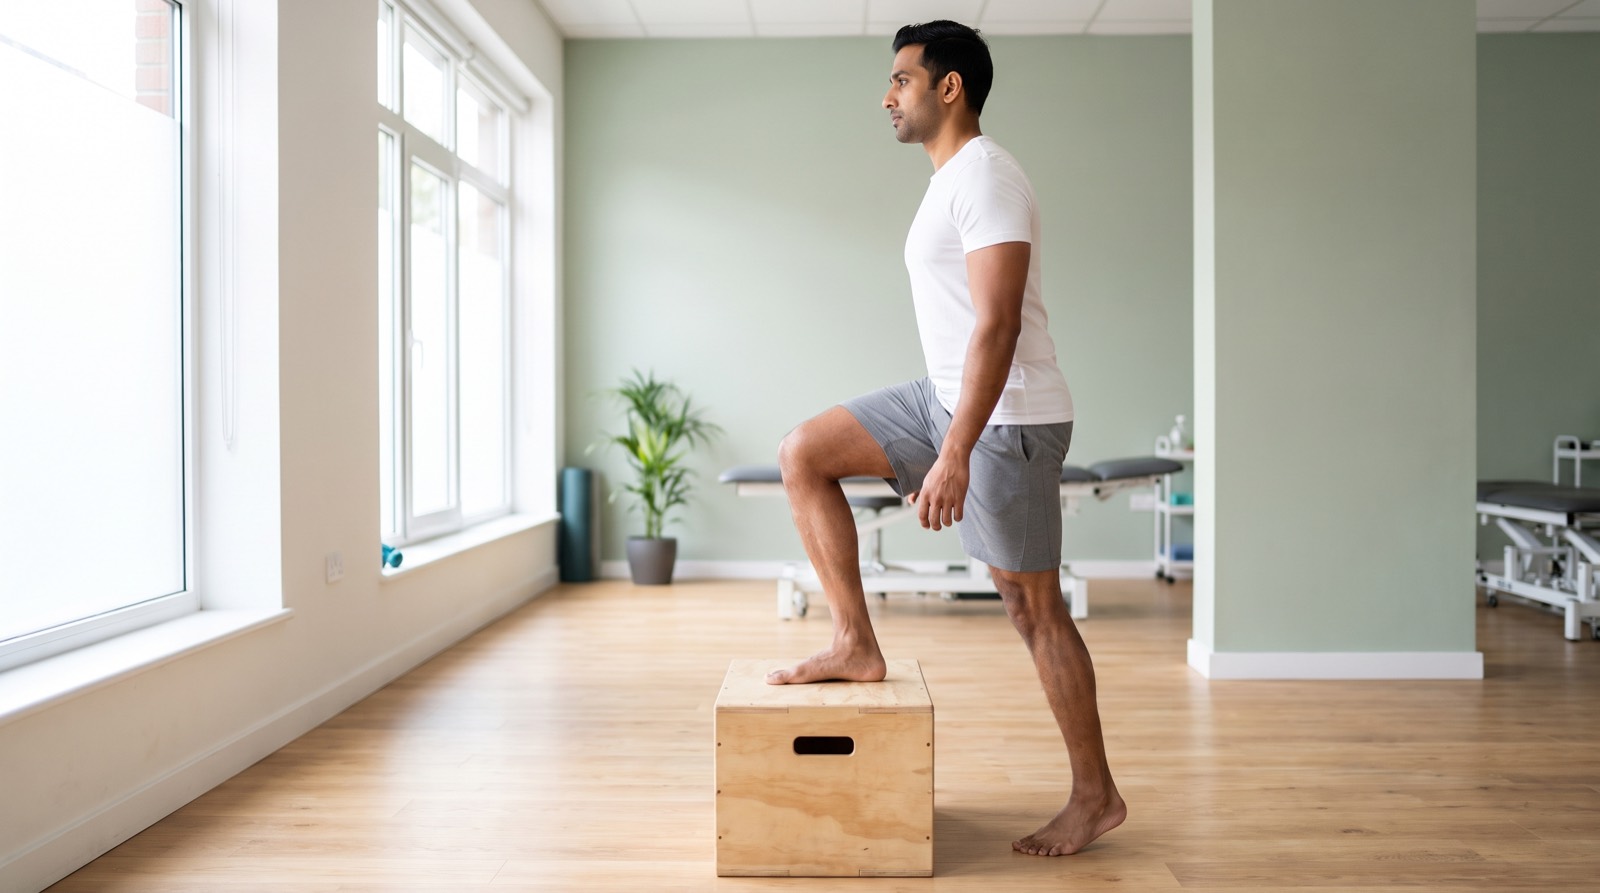
- Step ups. Use a step of 15 to 20 cm. Drive through the top leg, control the way down over 3 seconds. 3 sets of 8 to 10 per side. Progress the step height first, then add weight.
- Split squat. Feet in a staggered stance, lower the back knee toward the floor within a pain-free range, 3 seconds down, drive up. 3 sets of 8 per side. Hold the wall for balance at first, then let go, then add dumbbells.
- Terminal knee extension. Loop a resistance band around a fixed point at knee height and around the back of your knee. Stand with a slight bend and straighten the knee against the band. 3 sets of 15. Excellent for the last few degrees of extension that people commonly lose.
- Side lying hip abduction. Lie on your side, top leg straight, lift it about 30 to 40 degrees and lower over 3 seconds. 3 sets of 15 per side. Hip strength is what stops the knee collapsing inward.
- Calf raises. Stand on a step, rise onto the toes, lower the heel below the step over 3 seconds. 3 sets of 15, progressing to single leg. The calf shares the braking load with the knee on every step down.
Two things people skip in stage two, and both cost them. The first is the hip.
Weak glutes let the knee drift inward under load, which is a reliable way to keep a kneecap irritated. The second is single-leg work.
Life is single leg. Stairs, walking, running and every sport load one leg at a time, and two-legged exercises let the good side quietly do the work.
Split squats and step ups are not optional extras here, they are the point.
Moving up from Stage 2
Move to stage three when you can complete a full stage two session with pain no higher than 2 out of 10 and no next-day increase, perform 10 controlled single-leg sit to stands on the affected side, manage a full flight of stairs down without pain or a hand on the rail, and do 20 single-leg calf raises. Stair descent is the test that catches people out, because going down loads the knee far more than going up.
If stairs still hurt, stay in stage two and add step downs from a low step as your bridging exercise. Our guide to knee pain on stairs goes deeper into why that specific test matters.
Stage 3: load and return to activity
Stage three closes the gap between a comfortable knee and a capable one. This is the stage most people never reach, which is why so many knee problems come back the moment life gets demanding.
Train two to three times a week, rest 90 to 120 seconds between sets, and keep the controlled lowering. Only add the plyometric work once the strength work is comfortable, and only on a knee that is not swelling.
- Goblet squat. Hold a weight at your chest, squat to the deepest pain-free depth with heels down, 3 seconds down. 4 sets of 8. Progress load before depth if depth is uncomfortable.
- Walking lunges. 3 sets of 10 per side, bodyweight first, then holding dumbbells. Control the lowering, do not let the back knee crash.
- Step downs. Stand on a 20 cm step, lower the other heel toward the floor over 3 seconds, tap and return. 3 sets of 8 per side. This is the single best test and trainer of the knee control that stairs and running demand.
- Hip hinge (Romanian deadlift). 3 sets of 8, controlled. Trains the hamstrings and glutes that share load with the knee and protect it during deceleration.
- Early plyometrics. Begin with two-legged pogo hops, 3 sets of 20 seconds, focusing on quiet, soft landings. Progress to two-legged box drops from a low step, then single-leg hops. Add these only if your goal is running or sport.
The whole progression on one page
| Stage | Exercises | Dose | Move up when |
|---|---|---|---|
| 1. Calm it down | Quad sets, wall sit, straight leg raise, glute bridge, heel slides | Daily. Isometrics 4 to 5 holds of 30 to 45 sec. Movements 3 x 10 to 15 | 45 sec wall sit comfortable, 15 min flat walking, no next-day flare for 3 days |
| 2. Build strength | Sit to stand, step ups, split squats, terminal knee extension, side lying abduction, calf raises | 3 x weekly. 3 sets of 8 to 15, 3 sec lowering, 60 to 90 sec rest | 10 single-leg sit to stands, stairs down pain-free, 20 single-leg calf raises |
| 3. Load and return | Goblet squats, walking lunges, step downs, hip hinge, early plyometrics | 2 to 3 x weekly. 3 to 4 sets of 8 to 10, 90 to 120 sec rest | Symmetrical strength, controlled step downs, pain-free hopping if sport is the goal |
| Maintenance | Two stage 3 lifts plus one single-leg movement | 2 x weekly, ongoing | This is the stage you stay in |
How long should each stage take
Honestly, it varies more than any article can promise. A knee irritated by one heavy week of training might pass through stage one in five days.
A knee that has been sore for two years, or one recovering from surgery, may spend a month there. Tendon problems are slower than muscle problems, and knee osteoarthritis responds well but over months rather than weeks.
What is consistent is the shape: most people notice symptom change within two to four weeks of consistent work, and meaningful strength change from around six weeks. If you have done six weeks of genuinely consistent, correctly dosed work and nothing has shifted, that is your signal to get assessed rather than to add more exercises.
The four mistakes that stall knee rehab
- Doing stage one forever. Straight leg raises are wonderful for two weeks and useless for month three. Low load stops driving adaptation once it becomes easy.
- Training only the quadriceps. The knee is loaded by the hip above and the calf below. Ignore either and the knee keeps paying.
- Chasing pain-free before loading. Waiting for zero pain often means waiting forever. The rules above exist so you can train alongside some discomfort.
- Stopping the moment it feels better. Symptoms improve before capacity does. Stopping at "no pain" is exactly why the same knee flares again next season.
What about walking, cycling and swimming
They belong alongside the plan, not instead of it. Cycling on a flat, light resistance with the saddle a touch high is often well tolerated and keeps the knee moving through range.
Swimming and pool walking are useful when weight-bearing is provocative, particularly for arthritic knees. Walking is genuinely good for knees, and the common belief that walking wears them out is not supported by evidence.
But none of these build the strength that protects the joint under load. Use them for circulation, mood and general health, and do the strength work separately.
If you are returning to the gym, our companion guide on squats and knee pain covers how to reintroduce loaded squatting safely.
What a webpage cannot do for you
This progression is general and deliberately conservative, because we cannot see your knee. Knee pain has many causes: patellofemoral pain, a tendon problem, meniscal irritation, osteoarthritis, a ligament injury, referred pain from the hip or back.
They share exercise as a treatment but differ in which loads help and which provoke. An assessment is what turns this general ladder into your specific plan: which stage you actually start at, which two or three exercises matter most for your case, what to avoid for now, and how fast to climb.
If you want to narrow it down first, our joint-by-joint knee pain guide and the free interactive body scanner are good starting points.
Where a physiotherapist adds the most value
Two places. First, at the start, deciding what is actually driving your pain and therefore which stage and which exercises to prioritise, so you do not spend two months on the wrong ladder.
Second, at the top, where progression gets technical: how much load, when to add plyometrics, and whether the injured leg has genuinely caught up with the other side. At SattvaRig's Ahmedabad clinics we measure that rather than eyeball it, with strength and movement testing that shows the side-to-side gap in numbers.
That testing sits inside our injury rehab and mobility and strength assessment pathways, and it is the difference between hoping you are ready and knowing.
The bottom line
The best exercise for your knee is the right one at the right dose for the stage you are in. Calm the knee with isometrics and simple floor work.
Build genuine strength with single-leg loading three times a week. Then close the gap with squats, step downs and, if your sport demands it, controlled landing work.
Track your two pain numbers, move up on criteria rather than on the calendar, and do not stop the moment it feels better. If you are not clearly improving after six weeks of consistent work, or if anything in the red flag list applies, book an assessment.
SattvaRig has two clinics in west Ahmedabad, on Science City Road and inside Altitude Tennis Academy in Shilaj, open Monday to Saturday, 8am to 8pm.
Frequently asked questions
For an irritated knee, start with quad sets, wall sit isometrics held for 30 to 45 seconds, straight leg raises, glute bridges and heel slides, done daily. Once those are comfortable, progress to sit to stands, step ups, split squats and calf raises three times a week. Exercise choice matters less than staging and dosing them properly.
Most people notice a change in symptoms within two to four weeks of consistent, correctly dosed work, and meaningful strength gains take around six weeks or more. Longstanding problems, tendon issues and osteoarthritis usually respond over months rather than weeks. If six weeks of consistent work has produced no change at all, that is a reason to get assessed rather than to add more exercises.
Usually yes, within limits. A common physiotherapy rule is that pain up to about 3 out of 10 during exercise is acceptable if it settles within an hour and the knee is no worse the next morning. Stop and get medical assessment if the knee locks, gives way, swells rapidly, or is hot and red with fever.
Progress on criteria, not on the calendar. Move from stage one when you can hold a 45 second wall sit comfortably and walk fifteen minutes with no next-day flare. Move from stage two when you can do ten single-leg sit to stands, descend a full flight of stairs without pain, and complete twenty single-leg calf raises.
No, squats are not inherently bad for knees, and loaded squatting is part of the final stage of most knee rehab plans. The problem is usually depth, load or speed that exceeds what the knee can currently tolerate. Regressing to a box squat, split squat or wall sit and rebuilding from there works far better than avoiding the movement entirely.
Get answers for your body
Reading helps. An assessment fixes. Your first session at SattvaRig is a full strength and mobility assessment at Science City or Shilaj, Ahmedabad.